How to install
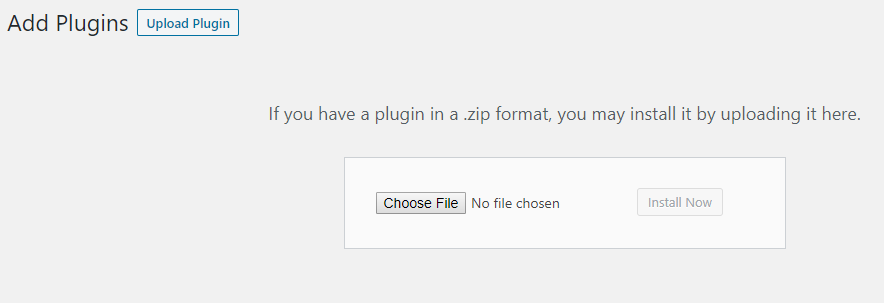
Go to plugin download page to download the latest zip file, and then login WP backend and go to “Plugins” page. Click “Add New”->”Upload
Plugin”->”Choose File” to upload our plugin zip file. WP will upload the file and install it automatically. SEMA API plugin will show up as below after
installation.

How to set up
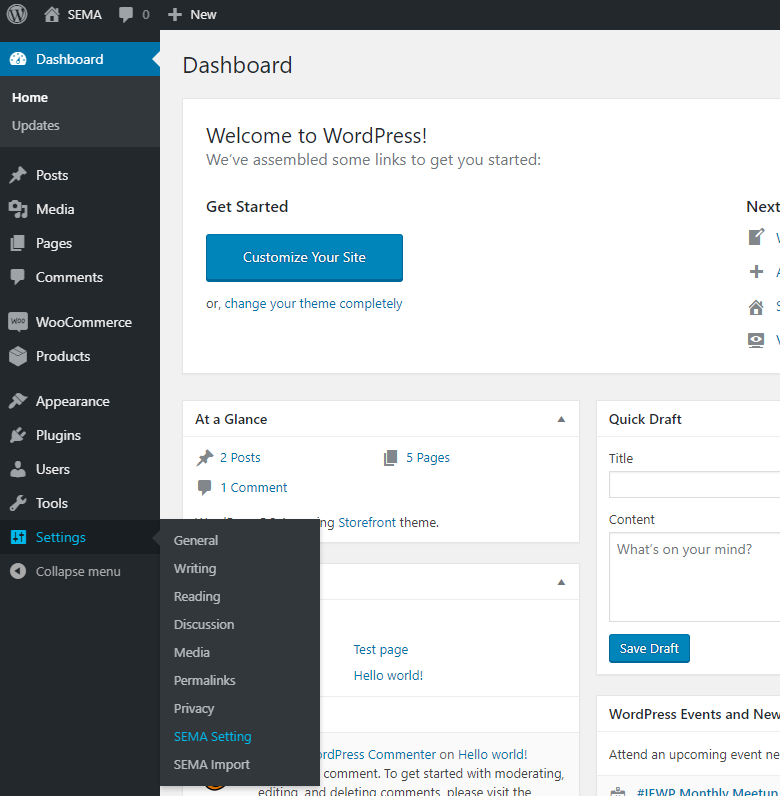
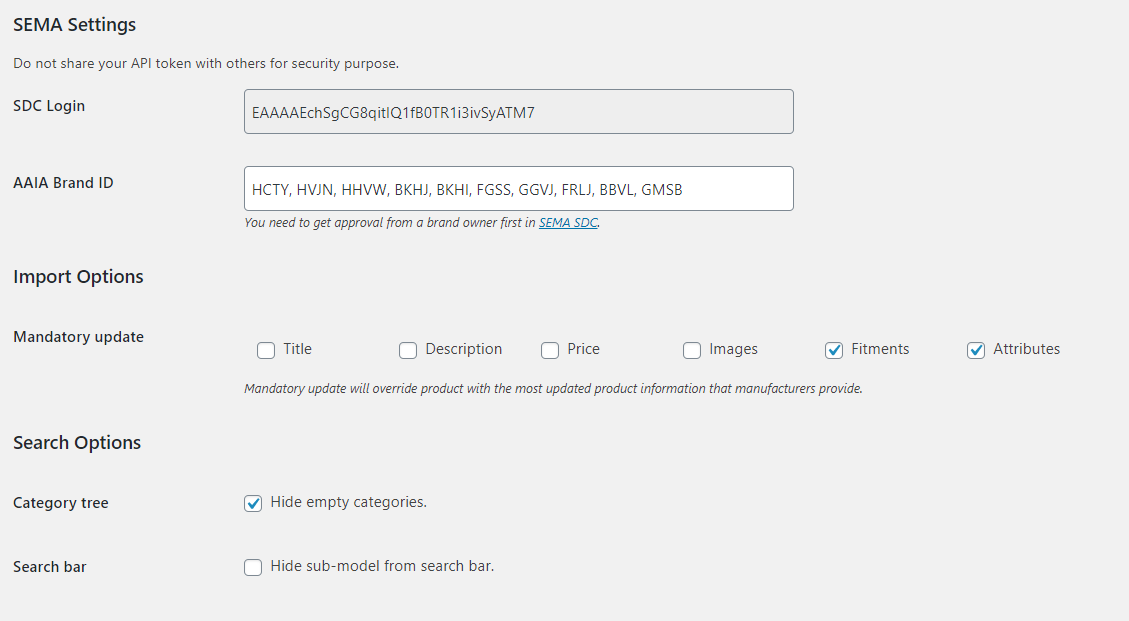
Click Settings->SEMA Settings to open SEMA Settings page. Enter your SEMA
SDC login username and password and click “Generate Token” button to generate a
token for API access.
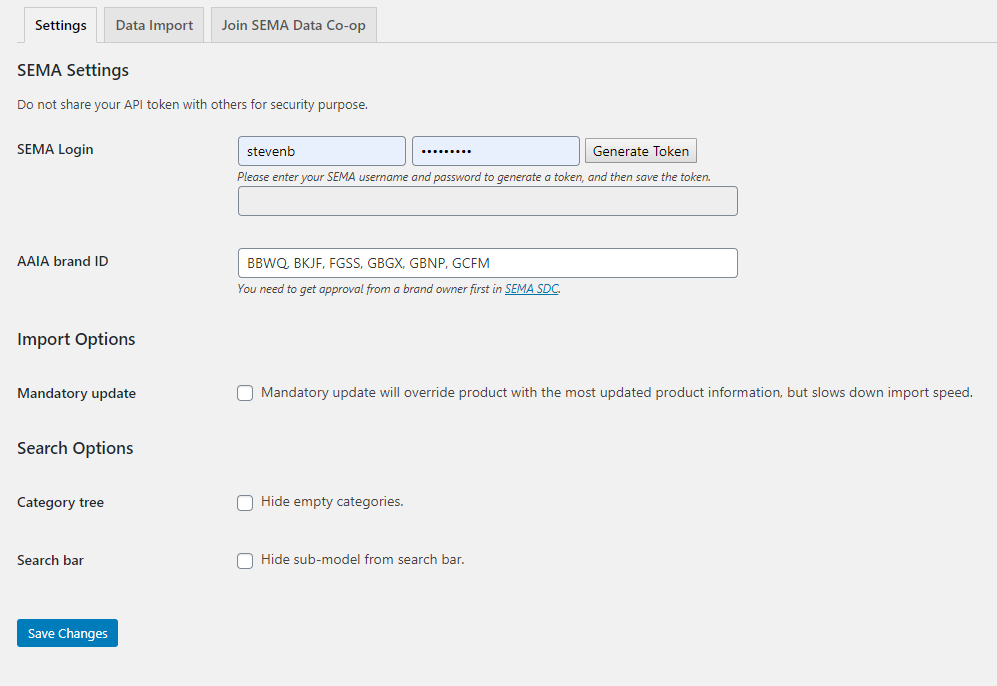
After token generated, please fill up “AAIA Brand IDs”
field. If you have more than one brand ID,
please separate them with space or comma.
Mandatory update: allow you
to update existing product with the most updated product information. You may choose which product information to be updated.
Category Tree: check this if
you want to hide empty categories on front end.
Search bar: check if option
if you don’t want to display Sub-model on front-end search bar.
How to import
Please go to “Data Import” page. Click on “Setting” button to set up the categories you want to import products
from.
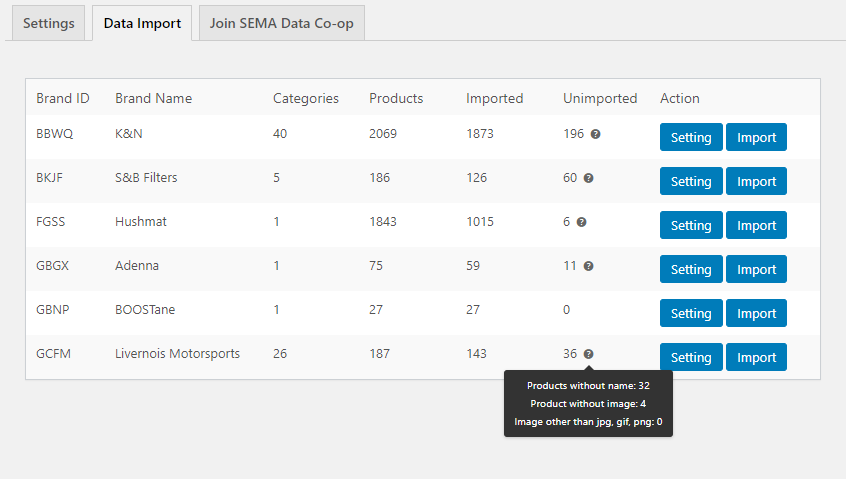
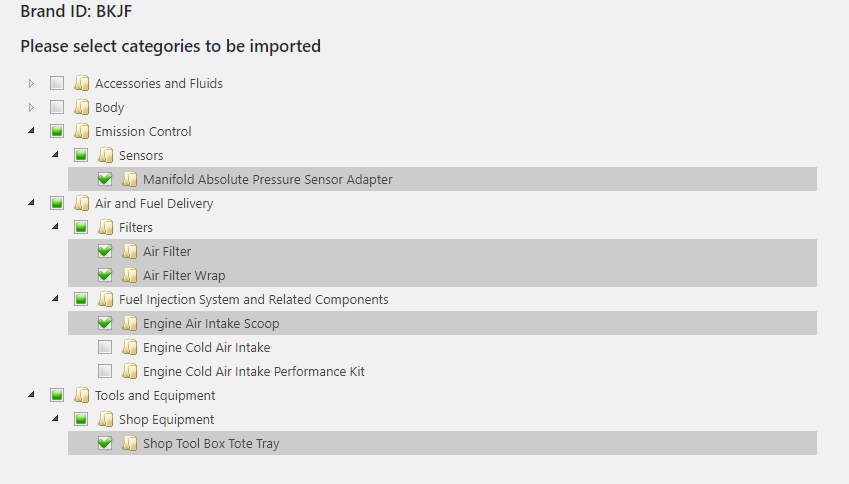
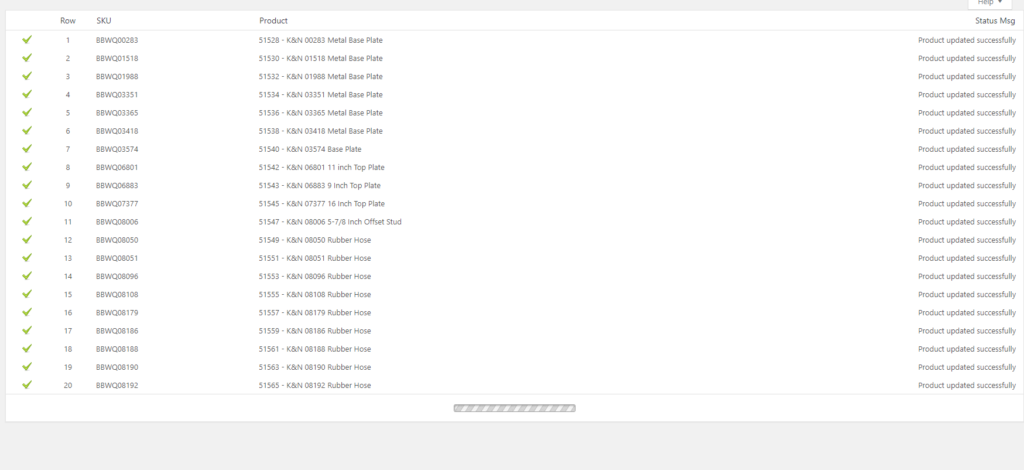
After save categories in Setting, please click on “Import”
button to start import. It takes 1-3 second to import
a product and product images to WP. Products can be imported repeatedly in
order to keep the most updated data.
- No product title: product without product name won’t be imported
- No product Image: product has at least one image.
- Product image does not exist: If image url is not accessible, product won’t be imported.
- Image format not supported: website supports 3 image format only, .jpg .gif and .png.
If you click on question mark(?) in the brand id list, you will see detail import error message for products.

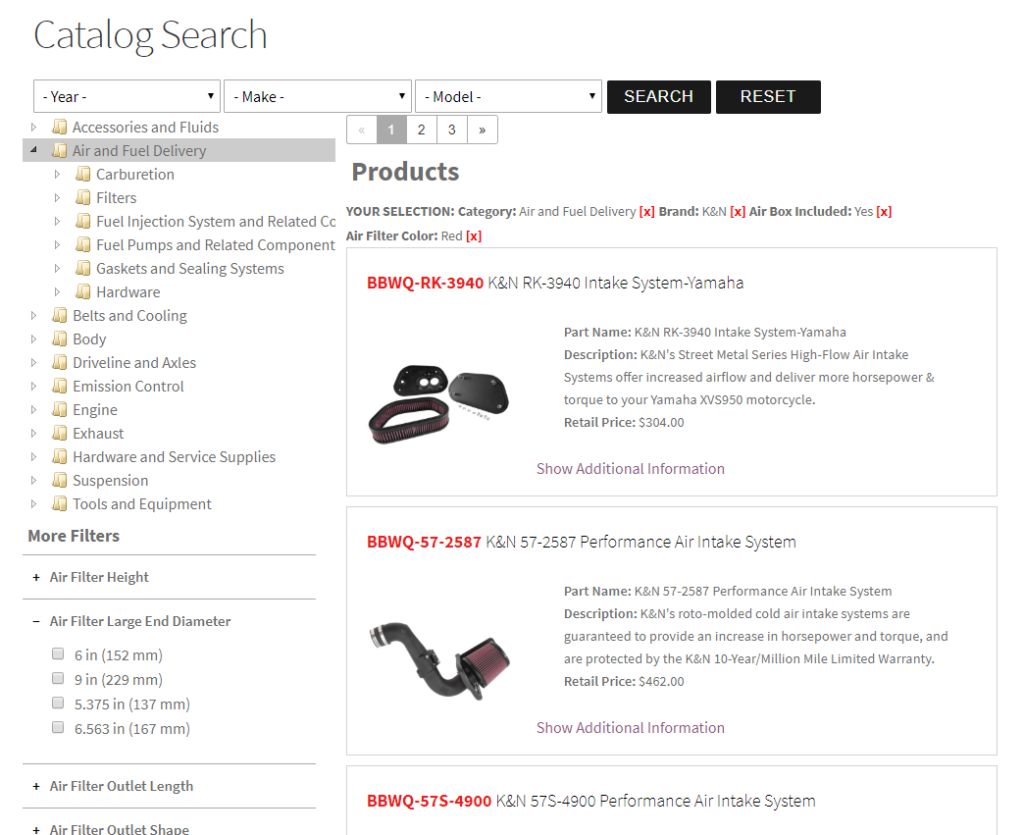
How to use SEMA search
SEMA catalog search page will be inserted automatically
after plugin is installed. Catalog search supports advanced search by
Year/Make/Model/Submodel, categories, brands and attributes.
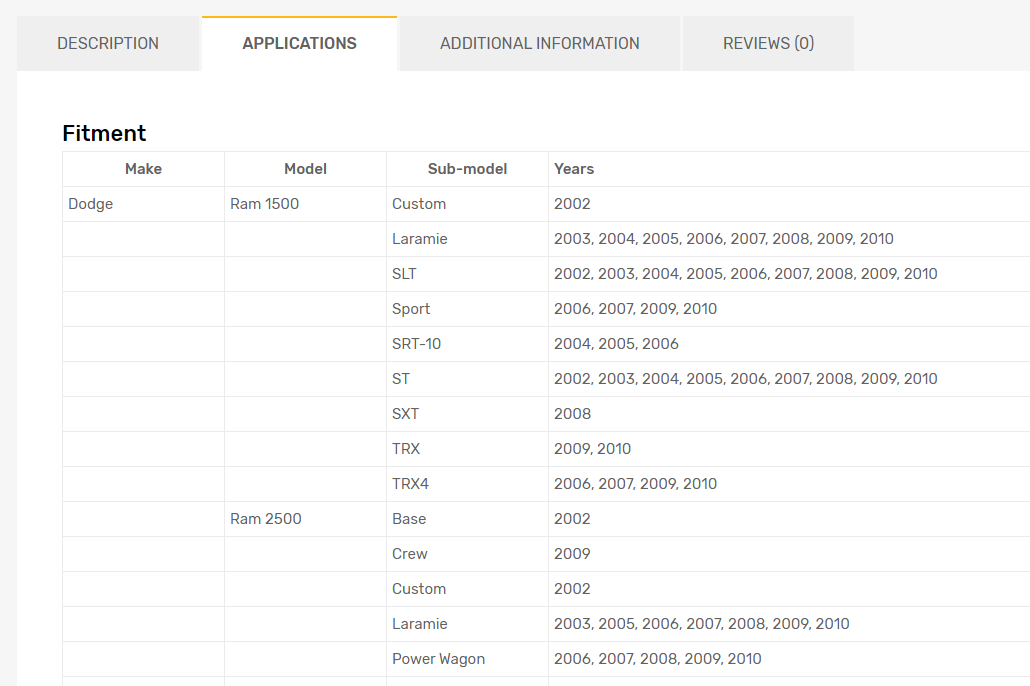
Product Applications
Add product applications to the product detail page to show fitment information like Year, Make, Model and Sub-model.
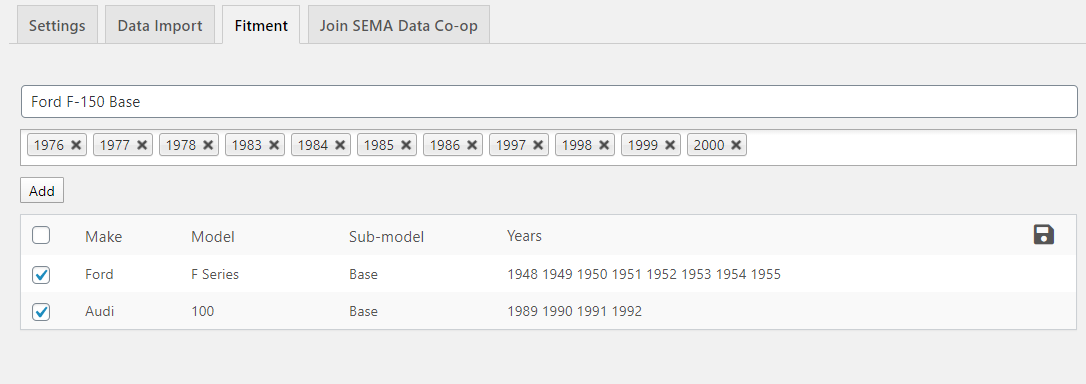
Custom Fitments
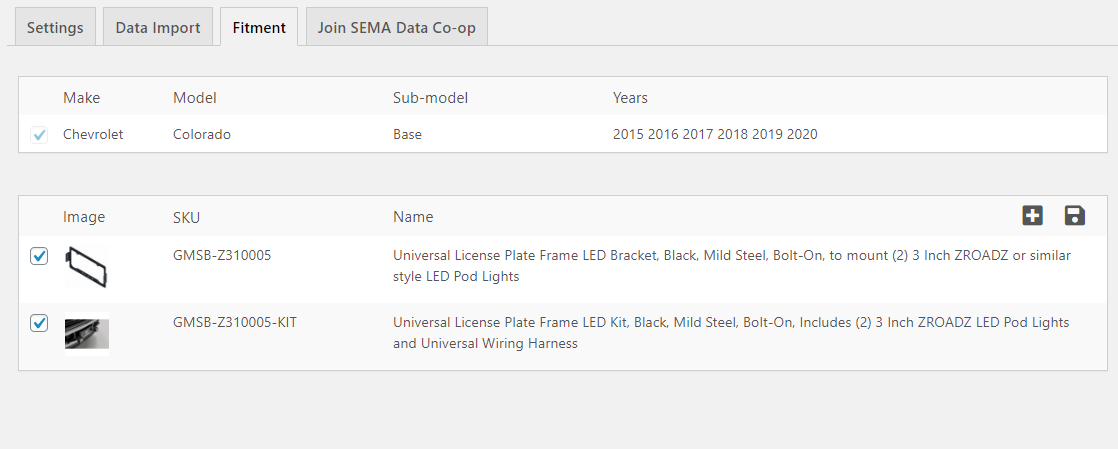
Our plugin will allow you to add/modify/delete fitment, as well as assign fitment data to non-SDC products. You can do this by clicking on the “Assign” button from the fitment list, then selecting the “+” button on the fitment edit page. Check the boxes off next to the products matching year/make/model/submodel, as desired. The search bar at the top of the “Assign to products” page can help to locate specific products easily. Once you confirm to add products to fitment, you must click on the “Save” button in the fitment edit section. If you would like to add any further vehicle or vehicle model/submodel data, please repeat the steps above and include all.
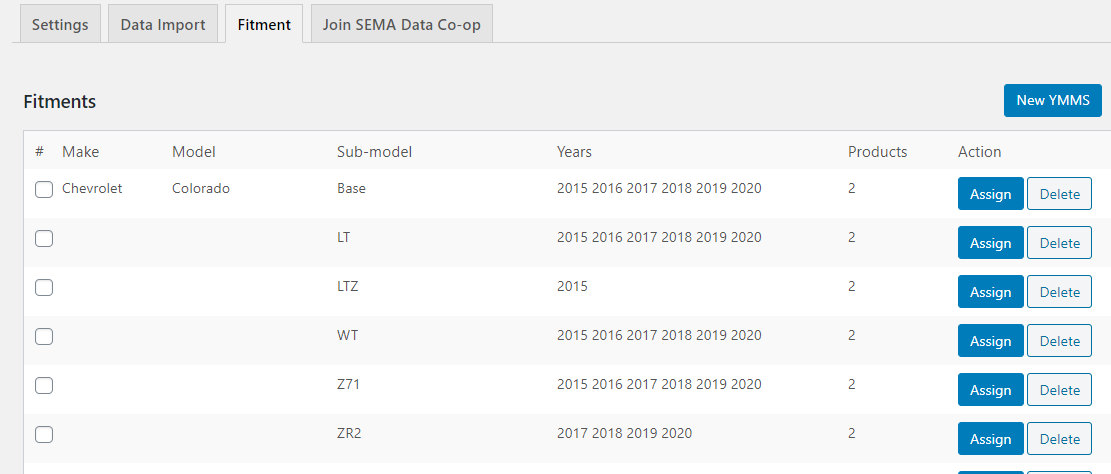

If you can’t find the fitment you want, please click on the “New YMMS” button from the fitment list page to add your own ACES data. Type Make/Model/Submodel in the search bar to find the vehicle that you are looking for. After you select the vehicle, all years matching it will populate. Delete the years that will not fit your parts then click the “Add” button. Once you have created the additional fitment, please remember to click the “Save” button to add the new fitments to your website. Congratulations! You can now assign products to your new fitments successfully.