How to install the Shopify app
You can install the SEMA API plugin by clicking on the link below. Expect to be redirected to your Shopify Apps page to install the SEMA API App. Next, click on the “Install unlisted app” button to complete the installation process. https://demo.semadatacoop.org/shopify/install.php?shop=YourShopName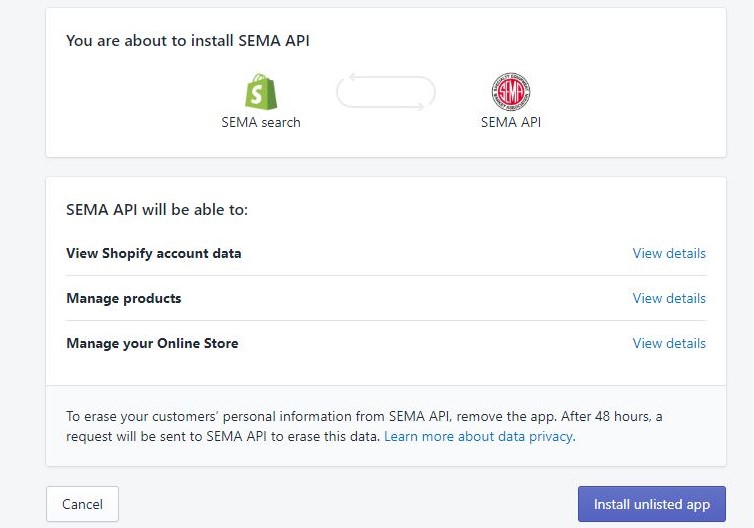 ** Please replace YourShopName with your own shopify store name.
How to set up
After installation, the SEMA API app will be listed on your Apps page. Click on our app link, you’ll be asked to choose if you want to add a catalog search page to your theme automatically or manually. We highly recommend that you select the “Automatic” tab, unless your collection page has a lot of custom features. ** We will not override your collection template liquid file. The Automatic method will insert the necessary code into your chosen theme to enable the catalog search, which you can reverse back at anytime. Instructions on how to add the catalog search page manually will be explained in the next section.

Settings
Enter the same username and password that you would when logging into the SEMA Data Co-op, then click the “Generate Token” button to retrieve a token for API access. Once the token is generated, you’ll need to fill in the “AAIA brand ID” field. If you have more than one brand ID, please separate them with a space or a comma. Don’t forget to click on the “Save” button to save the token and brand ID information that you added.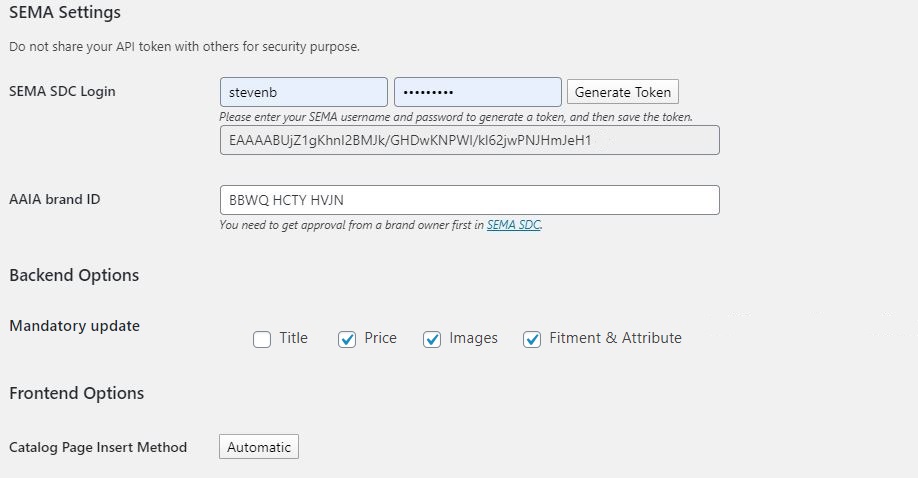 Mandatory update: Overrides existing products with the most updated product information. You may choose which product information to be updated.
How to import
Select the “Data Import” tab. Click on the “Setting” buttons to the right side of the page to establish the categories you’d like to import products from.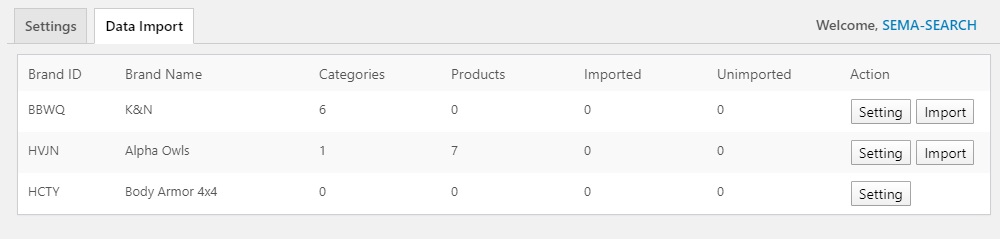
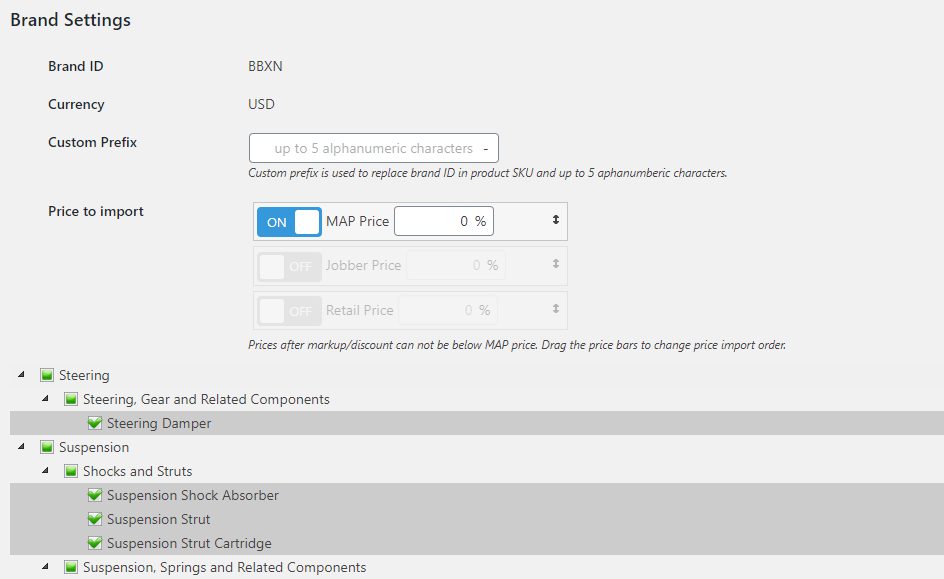
Before importing, it is necessary for you to visit each Brand Setting page to establish categories, configure prices, and determine markup or discount percentages. We provide three types of product prices: MAP, jobber, and retail prices. To import the desired prices, please enable them and specify the markup (positive value) or discount (negative value) percentage. You can arrange the import priority by dragging and dropping the prices accordingly. Keep in mind that discounting is not allowed on MAP prices, and if the jobber or retail prices fall below the MAP price after applying discounts, the MAP price will take precedence. The default currency for importing is USD, but you can easily switch to another currency in the settings page.
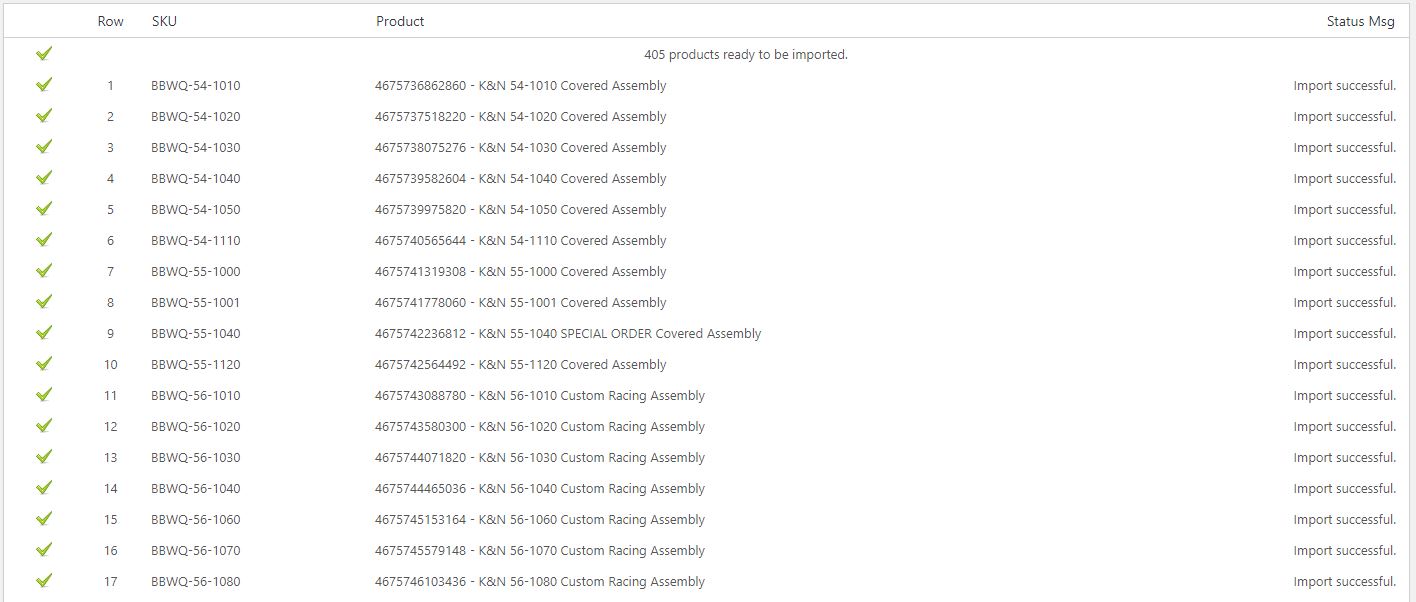
After saving your categories in Setting, click on the “Import” button to initiate the import process. It can take about 1-3 seconds to import a product and images to Shopify. You may import product periodically in order to obtain the most updated data. Our plugin only creates or updates SEMA products and new categories without affecting existing non-SEMA products and categories.
- No product title: Parts without a product name will not be imported
- No product Image: Parts without an image will not be imported.
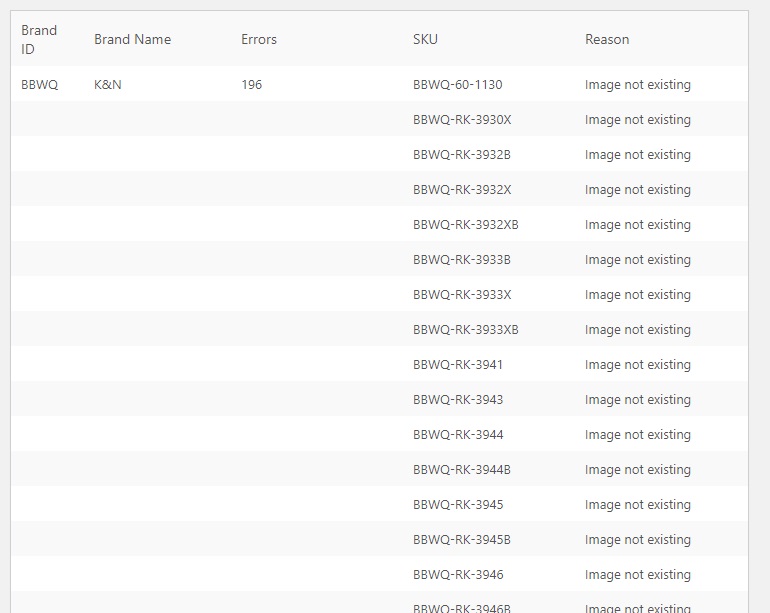
- Product image does not exist: If an image’s URL is not accessible, the part will not be imported.
- Image format not supported: Shopify supports three image formats only, .jpg .gif and .png.
Custom Fitments
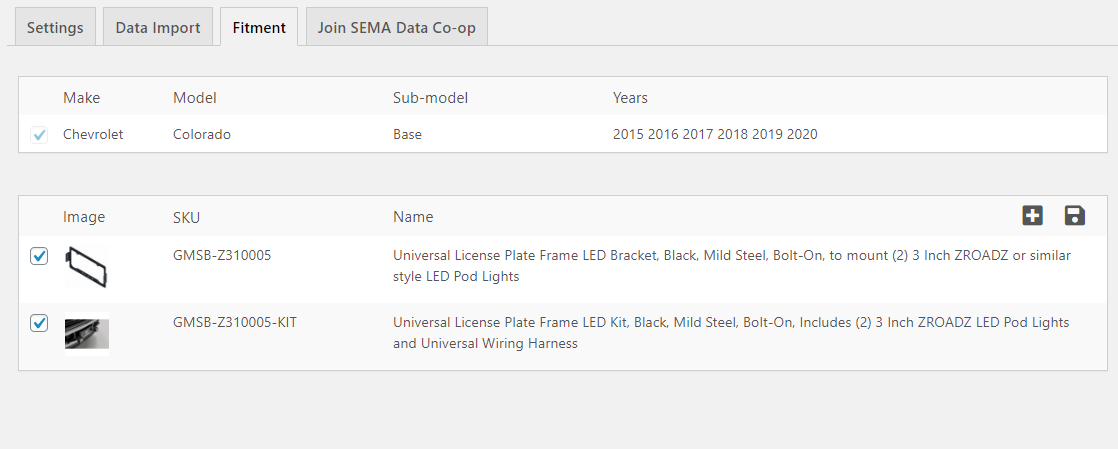
Our plugin will allow you to add/modify/delete fitment, as well as assign fitment data to non-SDC products. You can do this by clicking on the “Assign” button from the fitment list, then selecting the “+” button on the fitment edit page. Check the boxes off next to the products matching year/make/model/submodel, as desired. The search bar at the top of the “Assign to products” page can help to locate specific products easily. Once you confirm to add products to fitment, you must click on the “Save” button in the fitment edit section. If you would like to add any further vehicle or vehicle model/submodel data, please repeat the steps above and include all.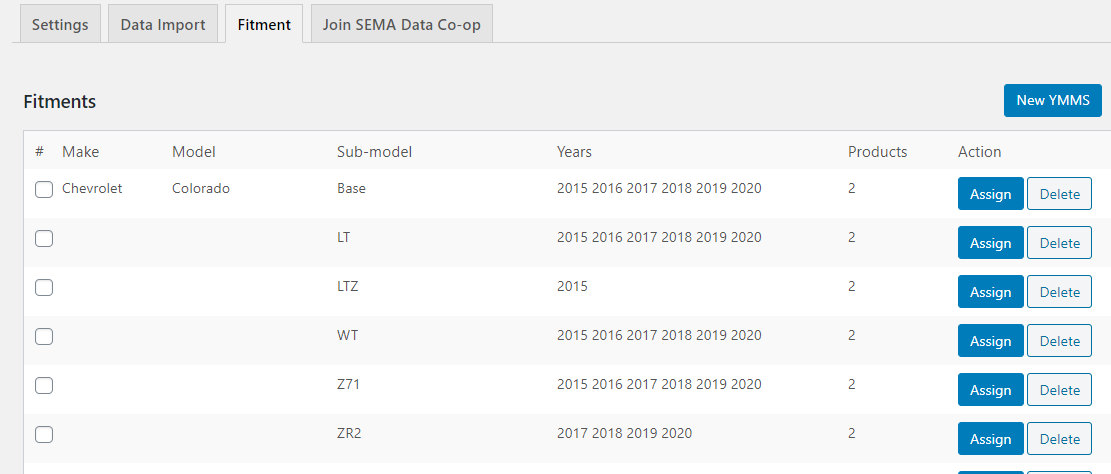
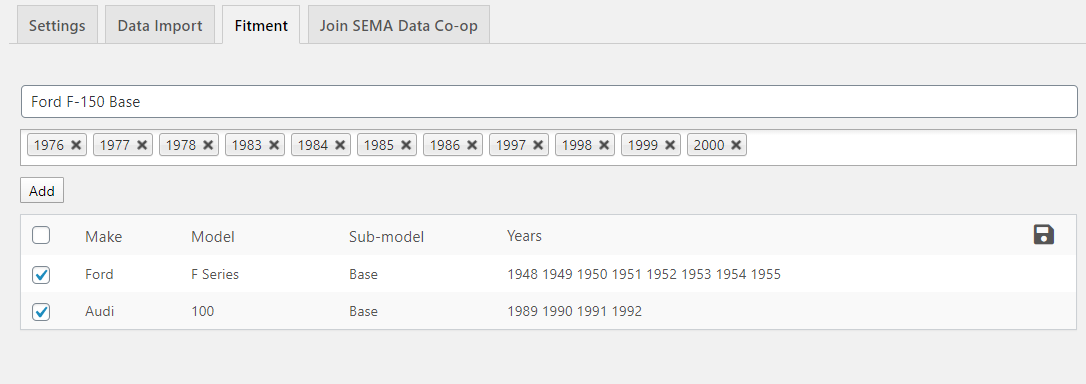
 If you can’t find the fitment you want, please click on the “New YMMS” button from the fitment list page to add your own ACES data. Type Make/Model/Submodel in the search bar to find the vehicle that you are looking for. After you select the vehicle, all years matching it will populate. Delete the years that will not fit your parts then click the “Add” button. Once you have created the additional fitment, please remember to click the “Save” button to add the new fitments to your website. Congratulations! You can now assign products to your new fitments successfully.
How to use SEMA search
If you choose the “Automatic” setting, the SEMA catalog search page will display as your collection page. If you choose the “Manual” setting, you’ll have to insert a custom page with a SEMA search template to your top navigation menu. The SEMA Catalog search supports an advanced search by Year/Make/Model/Sub-model, categories, brands and other attributes.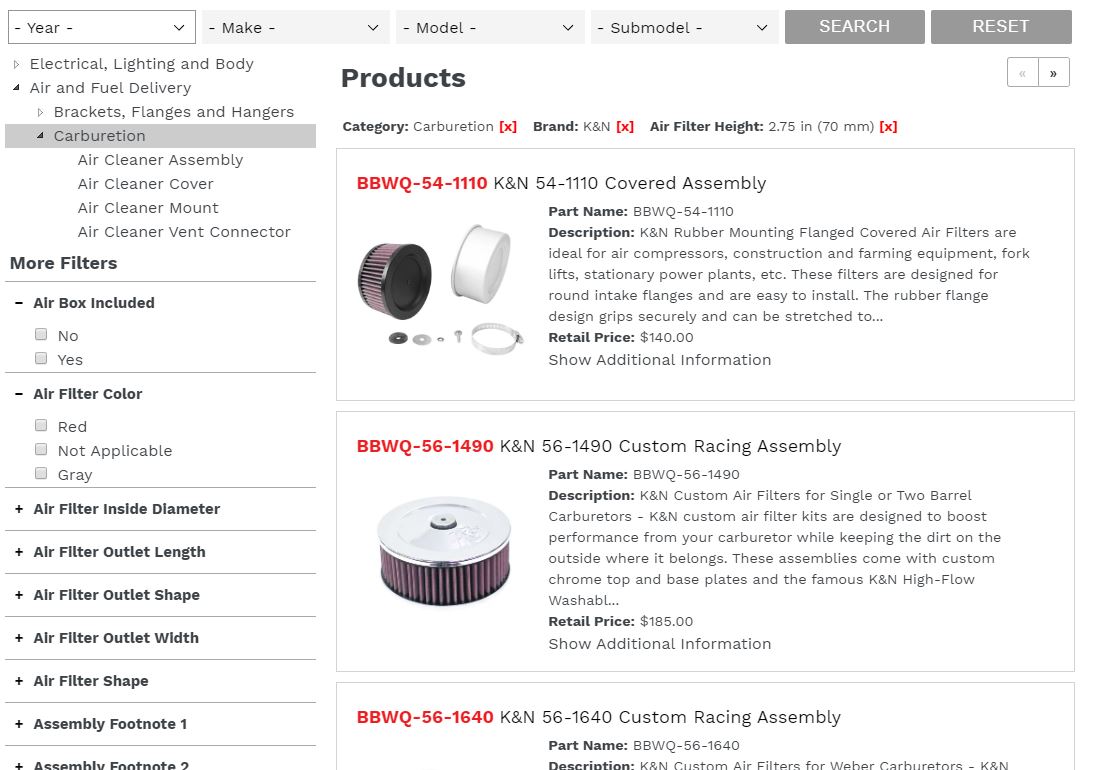
Automatic mode
If you opt for “Automatic”, our plugin will automatically insert the necessary code into your collection liquid file. This code can be easily undone by switching back to “Manual”. You may add to your top menu categories and sub-categories, which also have a built-in catalog search function. Shopify doesn’t allow apps to manage their menus, so you’ll have to add categories to your top menu on your own. Please choose the relative collection links and drag them to your menu. ** Since Shopify allows a maximum of 3 menu tiers , please add to them wisely.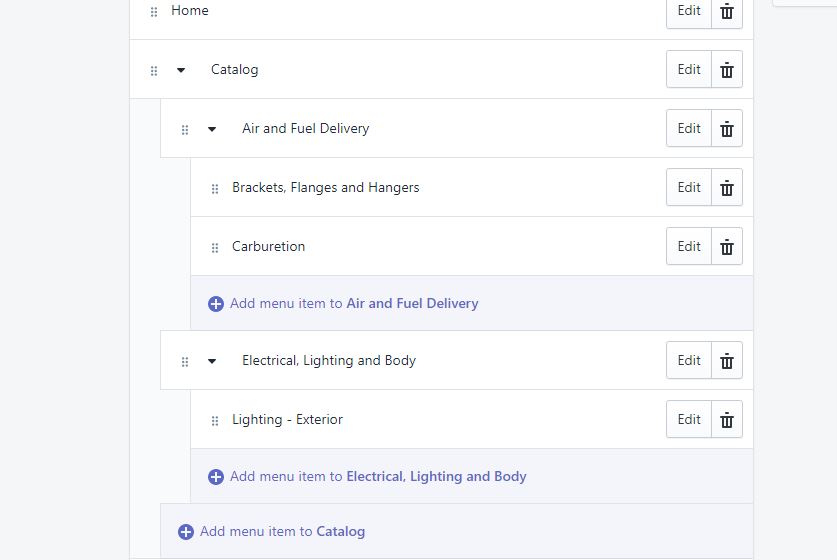
Manual mode
If you select the “Manual” insert method in the settings page, our plugin will not modify your front end, but you must add the Catalog Search page to your menu manually. Go to the “Online Store” => ”Navigation” => ”Main Menu” in order to manage your top menu. Click on “Add menu item” => Click on Link field => choose “Pages” from popup list =>choose Catalog Search page that is pre-inserted by our app.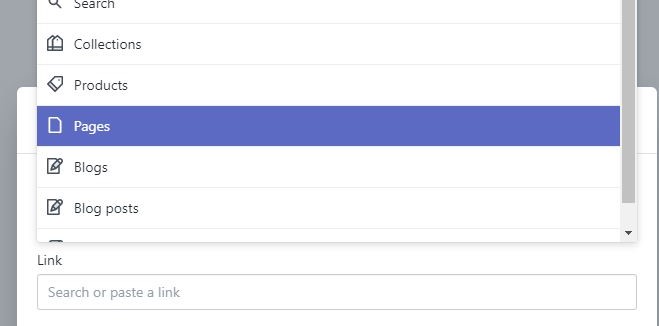
SEMA YMM Search Bar
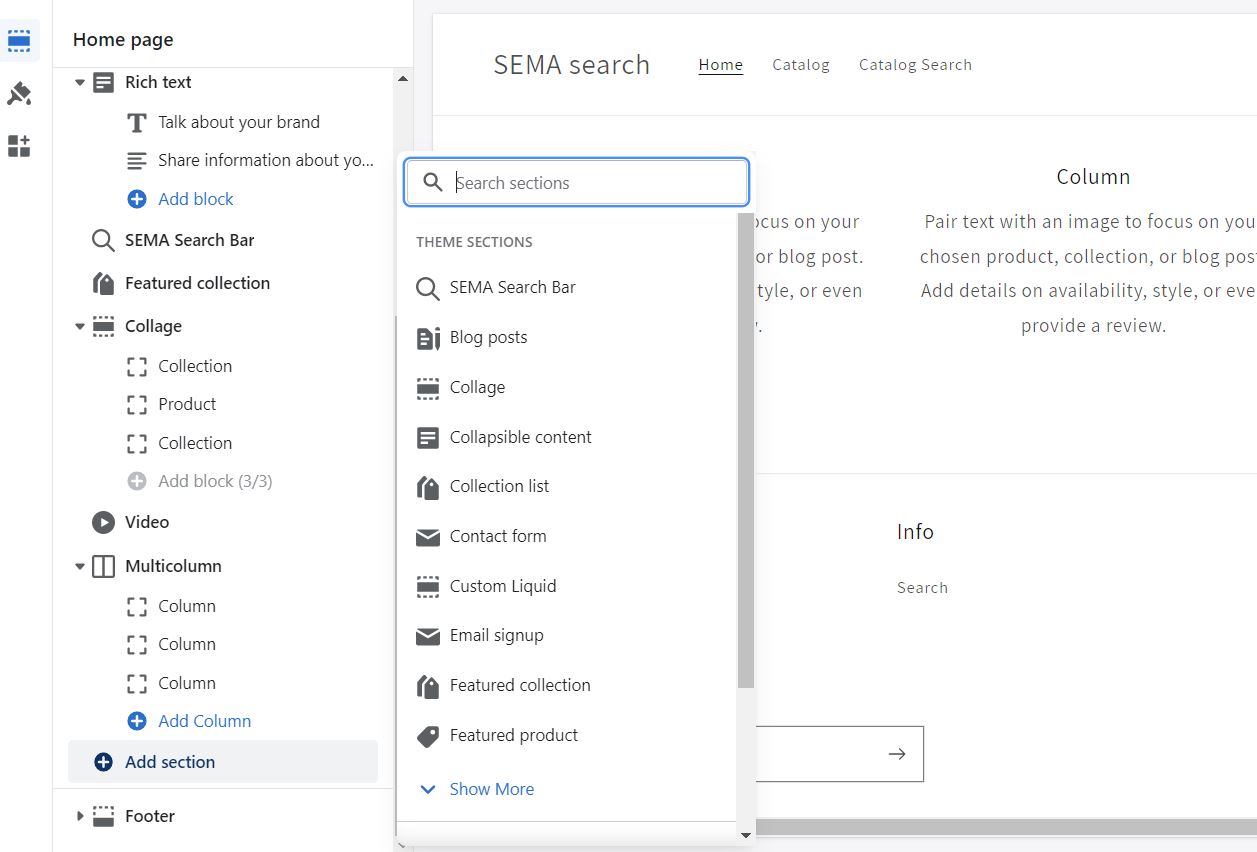
How to add SEMA Search Bar
Go to the “Online Store” => ”Themes”, and click on the ”Customize” button of your current theme. The default landing page is your home page. Please scroll down the left-side bar to the bottom, and click on “Add Section” link right above the footer section, choose the pre-inserted “SEMA Search Bar”, and click on “Save” on the top-right corner. ** If you didn’t see “SEMA Search Bar” in your custom section list, please go back to your setting page to save the settings again to ensure SEMA section templates are synced into your current theme.